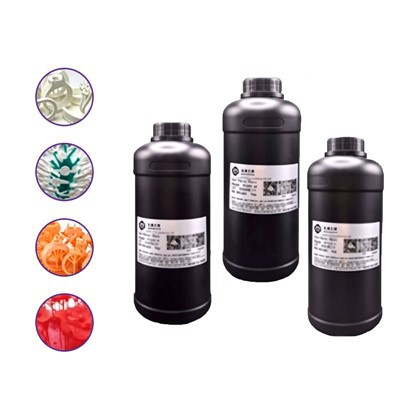
If you’re working with model wax materials—whether you’re a jewelry designer, 3D printing hobbyist, or industrial prototype maker—you’ve probably run into that annoying problem: wax sticking where it shouldn’t, or not sticking enough where you need it to. I’ve been in this game as a Model Wax Material supplier for years, and I’ve fielded way too many “How do I get wax to stay on wood/metal/PLA?” questions. Today, I’m breaking down the practical, science-backed ways to attach model wax to other materials, plus pro tips I’ve picked up from working with folks across manufacturing, jewelry, and custom design. First, a quick recap of why wax adhesion matters: if it’s for a lost-wax casting project, a wobbly attachment means a ruined piece; for a prototype, it could mean a flawed final part. Let’s dive into the actual steps that work.
First, let’s start with prepping the “partner” material—this is the make-or-break step most people skip. You wouldn’t glue paper to a dusty wall and expect it to hold, right? Same logic here. Different materials need different prep, so I’ll break down the most common ones: metal, PLA plastic, wood, and even other waxes. For metal (think 3D printed stainless steel, brass, or even old jewelry blanks), you need to get rid of all oils and surface grime first. Even the tiny bit of machine oil left from machining will stop wax from bonding. I suggest a quick soak in isopropyl alcohol (91% or higher) for 5 minutes, then scrub with a soft nylon brush and dry immediately with a lint-free microfiber cloth. If the metal has any rust or oxidation, a light sanding with 220-grit sandpaper will rough it up just enough—no need for heavy abrasions, we’re going for a micro-rough texture, not deep scratches. For PLA, that 3D printing staple, it’s a bit trickier because it’s a non-porous plastic that repels wax and most adhesives. A lot of people use sandpaper here too, but even better: a quick wipe with a bit of acetone (minimal, don’t douse it!) to etch the surface slightly. Wait, acetone can be harsh on some PLA finishes, so test on a scrap piece first—better safe than sorry, especially if you’re using specialized purple wax material for detailed parts. For wood, porous by nature, just sand until it’s smooth but has a visible grain (150-grit works great), then wipe off all sawdust with a tack cloth. No solvents needed here, the wood’s pores will grab onto wax once they’re clear.
Next, choosing the right wax type for the job. Not all Model Wax Material is created equal, and using the wrong one will lead to adhesion issues, guaranteed. If you’re attaching wax to a material that’ll be heated later (like for lost-wax casting), go for a wax that has compatible melting points—you don’t want one material melting before the other. We stock a range here: Jewelry Wax Material is perfect for casting because it bonds well to metal and has a clean burnout (link to Clean Burnout Wax here) with no residue, so when you melt the wax out of a mold, your metal piece stays perfect. If you’re working on a prototype that won’t be cast, like a decorative model, our Purple Wax Material is stiff and bonds nicely to PLA or wood, no extra adhesive needed sometimes. Wait, one quick note: never use a hard wax for a flexible attachment, or vice versa—hard waxes have higher melt points and won’t flow into rough surfaces as well, so adhesion suffers.
Now, the actual attachment methods. I’ve tested these hundreds of times, so they’re not just theory—they work. Let’s start with the easiest, no-tool method for small projects: hot wax application. You can use a low-temperature hot glue gun (set to 120-150°F, not high temp—high temp can warp plastic or melt soft wax) to melt small beads of wax onto the prepped surface, then press your wax piece firmly into place. Wait, don’t just plop it down—hold pressure for 30-60 seconds, or even 2 minutes if it’s a larger part. This lets the molten wax flow into all those tiny rough spots you created during prep, creating a mechanical bond (that’s the technical term for wax locking into crevices, not just sitting on top). For larger, more critical attachments (like a wax sprue for jewelry casting), we always recommend using a wax support material—wait, that’s our Wax Support Material, perfect for reinforcing connections that might pull apart during burnout or casting. You melt a small amount of that support wax along the joint, let it cool slightly, then attach your main wax piece; it adds rigidity so the bond doesn’t break. Another method for industrial or detailed work: solvent bonding, though this is more advanced. You use a tiny amount of wax-specific solvent (not regular paint thinner!) to thin the edges of both the wax piece and the partner material, then press them together. The solvent melts a tiny layer from both surfaces, so they fuse together into one solid piece. This works amazing for intricate jewelry designs, which is why our Jewelry Wax Material is formulated to work with those solvents. But here’s a pro tip from experience: don’t overdo the solvent—too much will make your wax soft and distorted, especially if you’re working with fine details. If you’re attaching wax to another wax piece (like joining two sprue parts), just rub a tiny bit of wax powder or a thin layer of molten wax at the joint before pressing—way simpler than any other method.
Wait, let’s talk about common mistakes that ruin adhesion, because I see these all the time from new users. First, not letting the wax cool properly before moving it. If you press a warm wax piece, it’ll shift and not form a tight bond, especially with uneven surfaces. I learned this the hard way when a client sent back a batch of jewelry castings because their sprues kept breaking—they were rushing, pressing the wax too soon, and the bond never set. Second, mixing wax types that don’t play nice. For example, using a soft, flexible wax for a joint that’s going to hold a heavy detail—soft wax will bend or tear, not stick. Third, skipping prep for non-porous materials. I’ve had users try to glue wax straight to PLA that was dusted with 3D printer powder, and wonder why the wax fell off a week later. The tiny plastic powder creates a barrier between the wax and the PLA, so even a quick sanding would’ve fixed it. Fourth, not cleaning tools between wax changes. If you used a hard wax for one project and a soft wax for another, leftover wax on your hot gun nozzle will mess up the consistency, leading to uneven application and bad bonds.
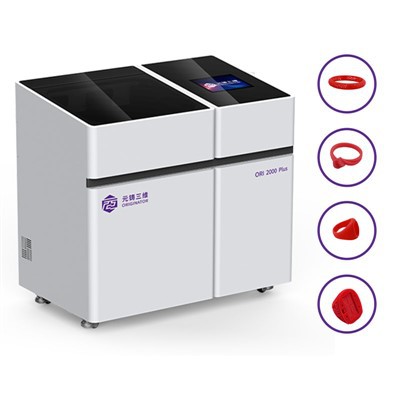
Let’s test this with a real example, to make it concrete. Suppose you’re making a custom ring using our Jewelry Wax Material. First, you 3D print a PLA ring blank (that’s your partner material). You sand the PLA lightly with 220-grit, wipe it with isopropyl alcohol to get rid of any printer oils, then let it dry. Next, you take your wax ring band, cut a small notch where you want to attach a wax setting for a gemstone. You take a small piece of our Wax Support Material, melt a tiny amount into the notch, press the wax setting into place, hold pressure for 1 minute. Wait 5 minutes for it to fully cool, then you test the bond by gently tugging the setting—if it doesn’t move, you’re good to go. When you send this to casting, the Clean Burnout Wax will melt completely out of the investment, no residue left, and the metal setting will stay firmly attached to the ring band. That’s the exact process our jewelry clients use, and it’s worked for 90% of their projects. If you’re doing a simpler prototype, like a model car part attached to wood, you can skip the support material—just sand the wood, wipe with a tack cloth, use our Purple Wax Material, melt a small bead where the part goes, press down, hold 30 seconds, done. No fancy tools needed.
Now, a quick note about troubleshooting if your wax won’t stick. If you followed all the steps and the bond is weak, first double-check your prep—did you wipe all oils? Did you rough up non-porous materials enough? Next, maybe the wax melting point is off. If you’re using a hot gun that’s too hot, it might overheat the wax, making it brittle instead of sticky. If it’s too cold, the wax won’t flow into the prep surface. Finally, if all else fails, reach out to me as a Model Wax Material supplier—we can help you pick the right material for your specific project, whether it’s for casting, prototypes, or something else entirely. No question is too small, I’ve helped hobbyists and big manufacturers fix adhesion issues for years.
Wait, one last thing to keep in mind: storage. If your wax material is stored in a damp or dusty place, that will affect adhesion too. I always recommend keeping wax in a cool, dry area, sealed in an airtight bag. If wax gets dirty, gently wipe it with a dry microfiber cloth before using—don’t wash it, water can cause it to crack or not bond properly.
Okay, to wrap this up, let’s recap the key steps so you don’t forget: 1) Prep the partner material: clean (no oils/dust), rough up non-porous surfaces for adhesion. 2) Pick the right wax: align type with your project (casting vs prototype, bonded to metal vs PLA). 3) Use the right attachment method: hot wax for most projects, support wax for critical joints, solvent bonding for fine details. 4) Avoid common mistakes: don’t skip prep, let wax cool fully, pick compatible wax types.
If you’re just getting started and want to explore the different wax options I mentioned—our Model Wax Material, Jewelry Wax Material, Purple Wax Material, Clean Burnout Wax, or Wax Support Material—head over to our site to check specs, find project guides, or even reach out to our team to talk through your specific needs. We work with all kinds of makers, from hobbyists to large industrial clients, so whatever your project, we’ve got the wax to help you get it right.


References:
- ASTM International. (2020). Standard Guide for Evaluating Adhesion of Thermoplastic Materials to Metal Substrates. ASTM D3359-20.
- Gibson, I., Rosen, D., & Stucker, B. (2021). Additive Manufacturing Technologies: 3D Printing, Rapid Prototyping, and Direct Digital Manufacturing (3rd ed.). Springer.
- Lost-Wax Casting Association. (2019). Best Practices for Wax Attachment and Burnout in Precision Casting. Technical Bulletin 07-19.